What makes our Awesome Mason Jar Wood Sign so Awesome? We show you step by step and reveal our secret tips for this awesome sign.
 Mason Jar Wood Sign Instructions
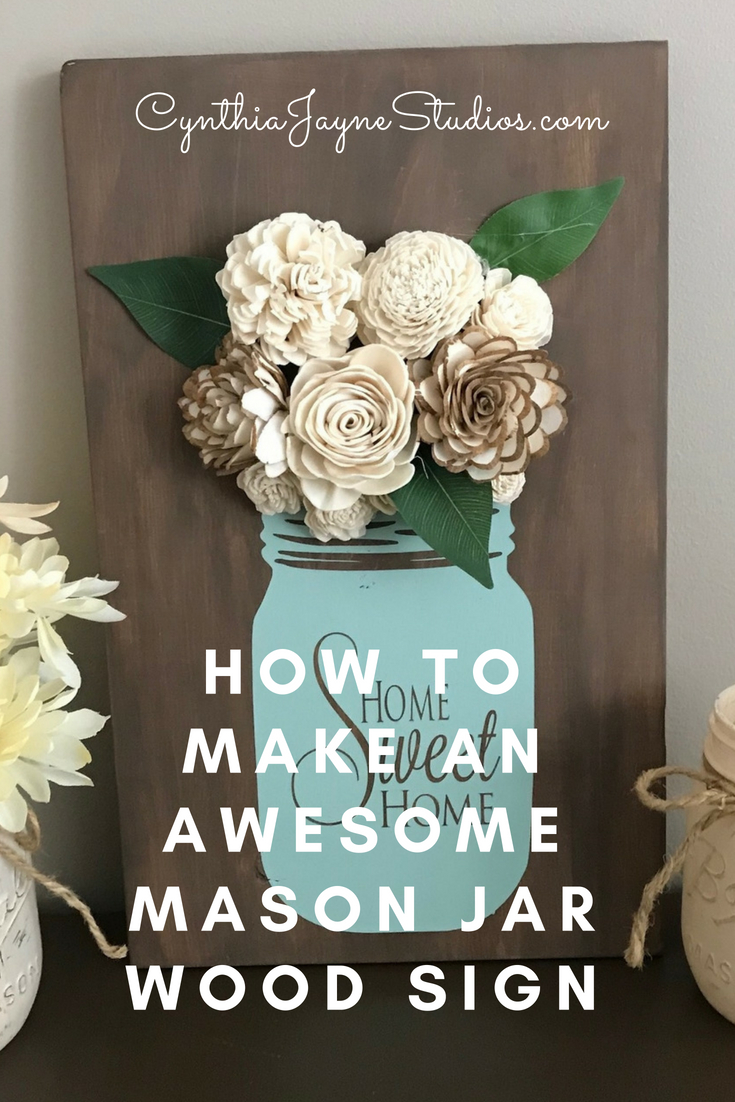
I’m going to show you how to make this Awesome Mason Jar Wood Sign. It is such a fun and easy sign project to make. What makes it so Awesome??? The use of Dixie Belle Paint and the addition of Sola Wood Flowers.
Our Mason Jar Wood Sign makes a great project to do with your kids and the perfect gift for any special occasion. Therefore, it especially makes for the perfect Mother’s Day project. Something made from the heart is always appreciated.
This post may contain affiliate links which we may be compensated for. There is no additional cost to you.
Supply List for your Mason Jar Wood Sign with Wood Flowers
Here’s a list of what you will need:
- a 1″ x 10” x 15” Pine Board
- An adhesive backed Stencil of a Mason Jar to fit
- Dixie Belle Paint in Coffee Bean
- Dixie Belle Paint in Sea Glass
- Sponge
- Water
- High Grit Sandpaper
- Medium flat Artist Brush like this one
- Straight pin or a metal pick
- Hot Glue Gun like this one
- Hot glue sticks
- Saw tooth hanger
- 6 to 9 Sola Wood Flowers and silk or burlap leaves (You can find them here: Wood Flowers)
We started with a 1” x 10” board cut to 15” and sanded it well. You’ll want to be sure to put your hanger on the back before adding the flowers so putting the hanger on now…. Is a great idea…. It is so much easier to put the hanger on before adding the flowers because the board can lay flat for that step right now. You don’t want to start putting the flowers on later and find that you totally forgot the hanger. (Ask me how I know).
Painting the Background
Next, I am ready to paint my background. My colors of choice for this project are Dixie Belle’s Coffee Bean for my background and Sea Glass for the design. I prefer Dixie Belle Mineral Paint for painting our signs. We used Dixie Belle exclusively in our DIY Studio when it was open. I usually water down the background paint color to a fairly thin consistency so I can use it like a stain. Coffee Bean thinned down and applied with a damp sponge can achieve a very nice stain like background. You don’t want a lot of paint on the board so you want to wipe the excess off with a clean side of your sponge.
Once the background is dry
Once the background is dry, (you can set it aside and come back to it, set it in front of a fan for 10 minutes, or give it a quick once over with an electric hair dryer…… yes, a hair dryer….. like you use to dry your hair. Makes quick work of drying a sign for the next step when you are as impatient as I am), it is time to sand the front down. This step is important because applying the paint to the board is going to raise the grain and you need to knock it down again. This step goes a long way in preventing bleed underneath the stencil.
Now you are ready to apply the stencil. Keep in mind that your flowers need room on the board above the mason jar design. I like to start my stencil about 1” from the bottom. Once you have your stencil applied to the board and the top tape removed, make sure the design is laying down well. I usually tilt it in the light so I can see the design and run my fingers over the edges of the design to be sure it is laying down well and adhering to the board.
Painting the Design
The next step is to help with bleed under the stencil. I put a thin coat of the Coffee Bean over the stencil first. The point of doing this is because it is the first layer on the stencil and if it bleeds, you will not be able to tell because it is the background color. You do not want it thick and heavy. Just a light coat will do. I usually put this on with a medium size artist brush but you could pounce it on if you like. When this layer is dry, I do the same with the color for the design. In my case….. Sea Glass. Letting it dry a few minutes between coats.
Once the second coat of Sea Glass is completely dry…. It is time to peel off the stencil. I peel off as much as I can and then go back with a straight pin to pick off what you didn’t get by pulling. Like the centers of the vowels, etc. Try not to dig into the wood. Just pick at the edge of the stencil.
Once the stencil is all removed, you will want to do any touch ups. I rarely have any touch up but it can happen.
Now the Fun begins
Now the fun really begins. I use 6 to 9 wood flowers. It really depends on the sizes you are using. I like using one around 2.5” to 3” in the center. Then 4 to 5 of the 1.5” x 2” flowers around the center one. Then, if I feel like I need them, I will use a couple of 1” flowers to fill in. I like to lay them out on the board so I know where they are going to be placed. Then spread them out a bit and start with the center one and work my way out. I just add a bit of glue to the bottom side of the flower and place it where I want it.
I then decide where my leaves are going. Put some glue on the ends and slip them in.
And now your Mason Jar Wood Sign with Wood Flowers is FINISHED!!! Yeah!!!! A beautiful piece of hand made art!!! Enjoy!!!!
More post you might like:
My Favorite Easy Peasy Background for Custom Wood Signs
Get Weekly News from Cynthia Jayne
Subscribe to get our latest content by email.